It’s very important to understand the best place to perform CPR. This is something you’ll near at a CPR class. The proper hand position is crucial when performing chest compressions as part of cardiopulmonary resuscitation (CPR). To have successfulresults, chest compressions must be performed in the right place and as quickly as possible.
During CPR, wrong hand positioning and lack of depth in the compressions are frequent mistakes that, while intending to do good, might do more harm. So, what position should you adopt when applying chest compressions, and where is the best place to perform CPR?
In this article, we will provide a guideline on performing high-quality CPR during an emergency.
Here’s all you need to know.
Overview of The Best Place to Perform CPR
Emergency medical procedures like cardiopulmonary resuscitation (CPR) can be vital in saving lives. Victims of cardiac and respiratory arrest need to receive high-quality CPR until the first responders arrive and transport them to a medical facility. CPR can be done by medical personnelin the ambulance and emergency departments, by laypeople in the public place, in the workplace or at home,or by emergency response personnel in the community.
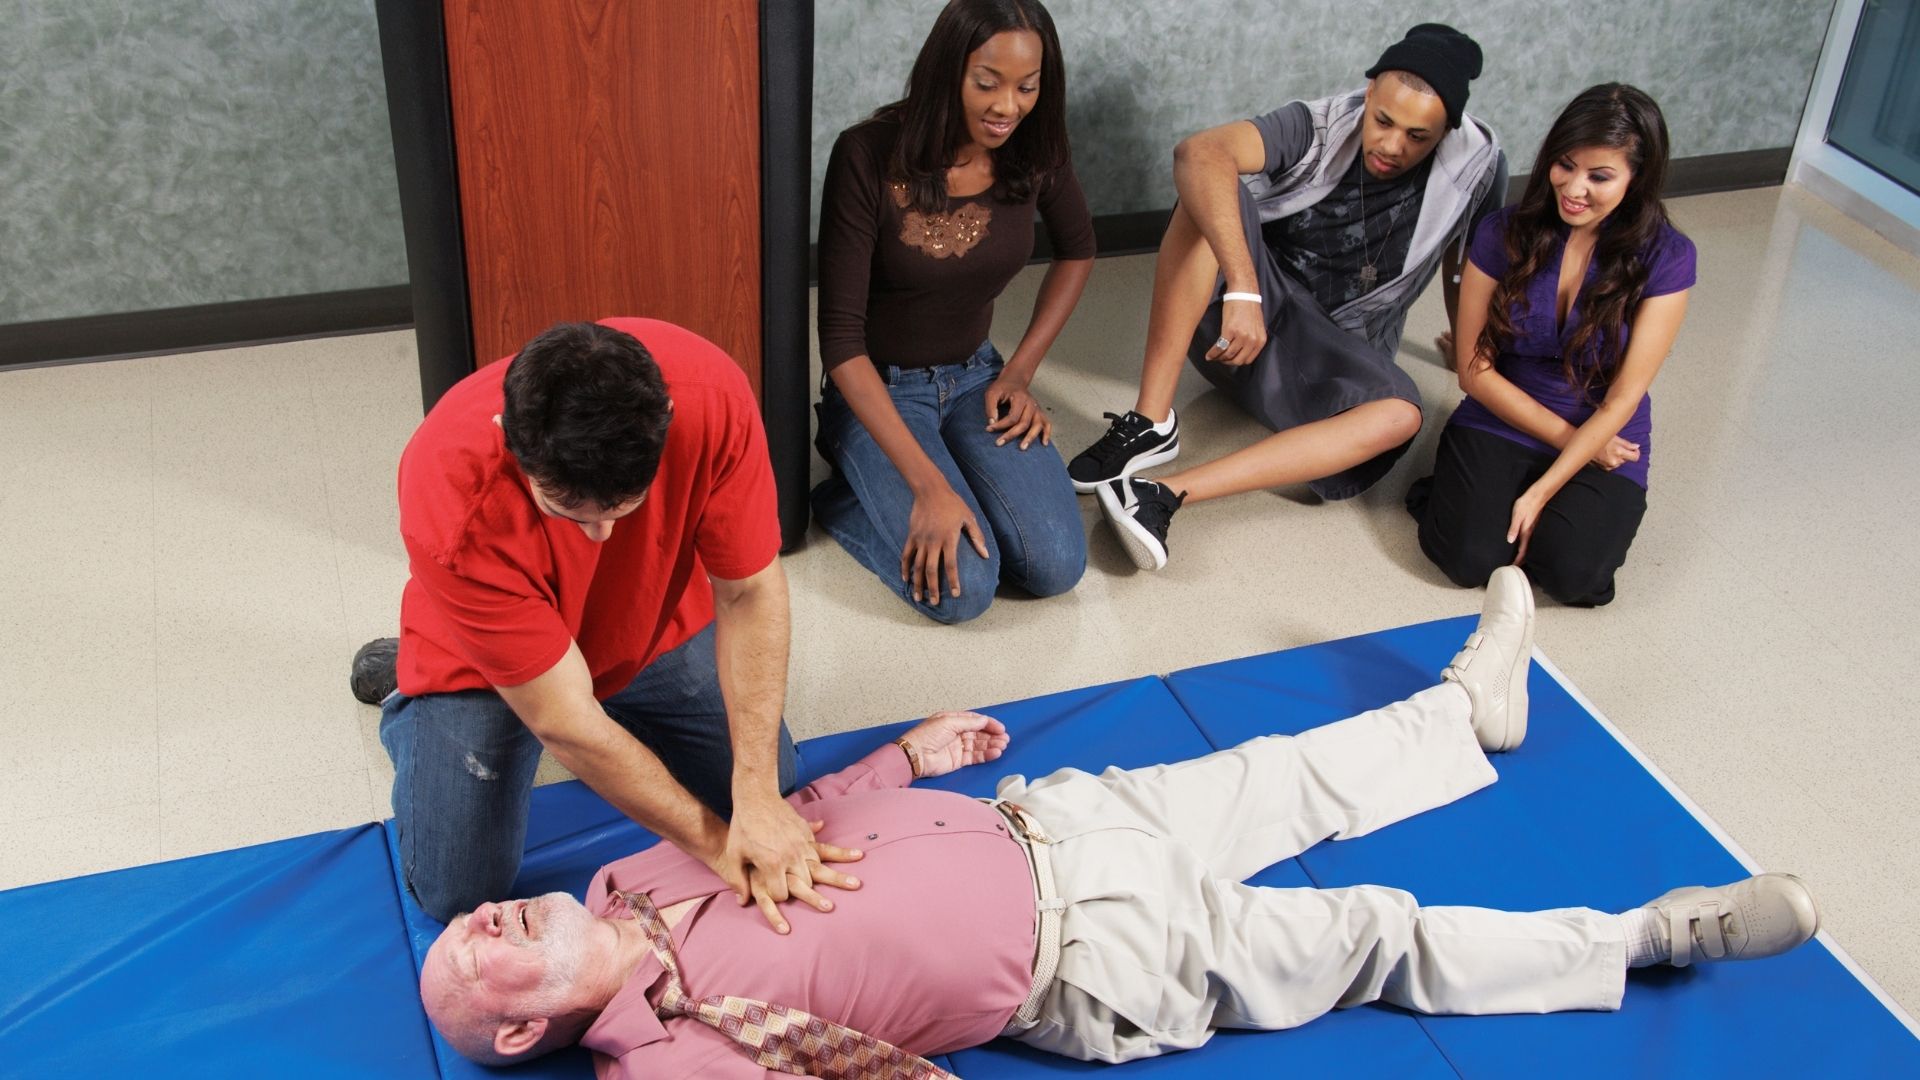
Because CPR relies heavily on deep chest compressions, it’s important that the victim is lying on a hard flat surface. If you find yourself in an emergency where the victim is lying on a bed, and you are unable to move them, you would have to try your best to perform quality CPR.
CPR is often performed until the patient restores a heartbeat, is pronounced dead, or the first responders from the emergency department arrive to take over. It’s important that you call 911 and start CPR immediately, as it can double or even triple the victim’s chances of survival.
First Aid & CPR
CPR is a component of the chain of survival,which includes easy access to emergency medical personnel and healthcare provider, earlyCPR, quick defibrillation, and rapid advanced care, according to the American Heart Association guidelines and Sudden Cardiac Arrest Foundation.
One in 360,000 Americans has sudden cardiac arrest each year, making it the third greatest cause of mortality in the country.
When performed right away, and you know the best place to perform CPR, it can significantly increase the victim’s chance of surviving.About 25% of patients incardiac arrest receive CPR from a bystander, and an additional 33% do so as a result of operator instructions, according to the United States “Annals of Emergency Medicine“.
Anothercrucial elementis fast access to defibrillation. Ventricular fibrillation is a potentially lethal arrhythmia that is typically brought on by a heart attack and is responsive to automated external defibrillation (AED) is the most frequent cause of cardiac arrest outside of a clinic.
The Best Place to Perform CPR and Proper Hand Position
Chest compression performanceis significantly influenced by hand positioning and is crucial to the safety and life of cardiac arrest. The American Heart Association (AHA) guidelines for Cardiopulmonary Resuscitation and Emergency Cardiovascular in out-of-hospital situations must be followed by the rescuer to perform high-quality CPR.
An up-downposition of a handswitch may also prevent non-dominant hand position rescuers from being too worn out. Additionally, it enhances the quality of chest compressions throughout cardiopulmonary resuscitation.
How many hands should I use during CPR?
Once you know the best place to perform CPR, now y ou must know the proper way of doing it. When performing CPR, you can use one or both of your hands. Nevertheless, using two arms puts extra strain on the chest. Therefore, it is advised to use both of yourhands when performing CPR on adults and children past the age of puberty or those weighing more than 55 pounds. Since adult bones are usually less fragile than those of infants, usetwo of yourhands to apply the necessary deeper compressions of up to 2 inches (5cm) and no more than 2.4 inches (6 cm).
Using only onehand is advised for young kids, typically 1 to 8 years old. Since infants are more delicate than pre-teens and teenagers, you can only use two or three fingers. Too much pressure may result in bone fractures or significant organ damage.
Proper CPR step-by-step
The preparation stage and the CPR stage consist of two phases.
Steps in preparing
Applythe following procedures before performing CPR on an adult:
Step 1. Call 911
First, look around for anything that can threaten you, like traffic, a fire, or falling scaffolding. Check the person afterwards. Do they require help?Are they breathing? Do they respond to your voice?
If they are not responsive, before beginning CPRdial 911 or request that a witness dials it for youand instruct someone to golook for an AED if at all possible. These can be found in many city areas, including offices.
Step 2. Turn the person over and opentheir airway
Tilt the head back just enough to elevate the chin while the person is lying on their back.
Step 3. Check for breathing
Observe their chest for no longer than 10 seconds while keeping your ear close to the person’smouth. Start CPR if you cannot hear a personbreathing or if you only occasionally hear breaths.
Don’t attempt CPR on a person who is breathing but unresponsive. Rather, put them in the recovery posture if they don’t appear to have a spinal injury. Keep an eye on their respiration, and if it stops, perform CPR.
CPR steps
To perform CPR, use these steps:
Step 4. Perform 30 chest compressions
Lock your handsby stacking one hand on top of the other. Push quickly and forcefully in the center of the chest, just below the nipples, using the bottom of the palms and upright elbows.
Push down at least two inches, at least 100 to 120 times each minute.
Step 5. Perform two rescue breaths
Elevate thechin and lean their head backwards, assuring thattheir mouth is open. Pinch their nose shut, put your entire mouth over theirs, and blow.
Retilt the head if the chest doesn’t expand while taking a breath. The individual may suffocate if their chest does not rise after taking another breath.
Step 6. Repeat
Until the person begins to breatheor assistance comes, continue the process of 30 chest compressions and two rescue breaths. Continue practicing CPR even if an AED arrives until it is prepared to use.
Best Place to Perform CPR for Children and Infants
The best place to perform CPR procedures for children and infants differ slightly from those for adults.
Preparation steps
Apply the following preparation techniques before performing CPR on a baby or child:
Step 1. Call 911 or provide two minutes of care
First, examine your immediate surroundings for danger-causing elements. Check the child or infant again to see whether they still require assistance. If it’s a child, tap them on the shoulder and shout to gain their attention. Check to see if infants react by pinching the bottom of their feet.
If alone with the child and they are not responding,call 911 or ask someone to do it for you.
Step 2. Turn the child over and opentheir airway
Kneel next to the child or infant’s chest while carefully placing them on their back on a flat and firm surface. Elevate their chin and gently tilt their head backwards.
Activate the mouth. Check for any food or vomiting blockage and remove it if it’s loose. Do not touch it if it is not loose because doing so could push it further into their lungs.
Step 3. Check for breathing
Listen for around 10 seconds with your ear close to their mouth. Start performing CPR if you don’t hear breath or if you just occasionally hear gasping.
As infants typically breathe in and out at regular intervals, changes in their breathing habits are common. Keep an eye on their respiration, and if it stops, perform CPR.
Looking At The Best Place to Perform CPR and The Steps
Use these steps to perform CPR on a child or infant:
Step 4. Perform 30 chest compressions
Kneel next to the child or infant.
Use one of your hands for a child or two fingers for infants. The core of the chest is between and just below the nipples. Place the palm of your hand there. At least 100-120 times a minute, press down firmly and quickly about 2 inches deep, or about one-third the depth of the chest. For infants, press down firmly and quickly about 1,5 inches deep.
Step 5. Perform two rescue breaths
Deliver two rescue breaths with the child’s head tilted back in a slightly past neutral position.
Place your mouth over a child’s and pinch their nose hard. Breathe in their mouth two times.
Step 6. Repeat
Go over the cycle of rescue breaths and chest compressions until the child begins to breathe again or help arrives.
What We Learned About The Best Place to Perform CPR
Understanding the best place to perform CPR is important. A CPR certificate says you know a life-savingtechnique.After an incident or trauma, it can dramatically increase a person’s chances of survival if they have a heart attack or stop breathing.
Based on whether the person is an infant, child, or adult, the steps change. The fundamental pattern of chest compressions and rescue breaths will remain the same. When an adult has stopped breathing, just perform CPR. Before beginning CPR, make sure the patient is responsive to verbal or physical instructions.